Categories
Exercise

Tricep Dips

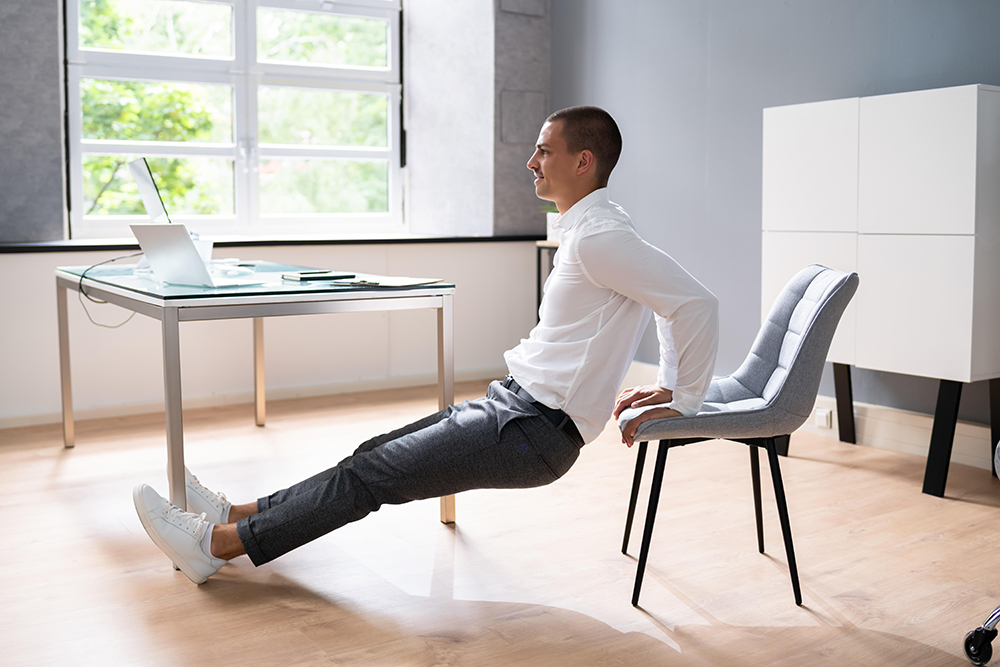
How to Do Tricep Bench Dips
  • Sit on the edge of a stable chair, weight bench, or step and grip the edge next to your hips.
  • Your fingers should be pointed at your feet, your legs extended, and your feet about hip-width apart, with your heels touching the ground. Look straight ahead with your chin up.
  • Press into your palms to lift your body and slide forward just far enough that your buttocks clear the edge of the chair.
  • Lower yourself until your elbows are bent between 45 and 90 degrees. Control the movement throughout the range of motion.
  • Push yourself back up slowly until your arms are almost straight, and repeat.
What Muscles Do Triceps Dips Work?

Triceps dips primarily target the triceps brachii, which is the large muscle on the back of your upper arm. This exercise also engages the deltoids (shoulders), pectorals (chest), and the muscles of the forearm to a lesser extent. Additionally, when performed with proper form, triceps dips engage the muscles of the core and stabilizers to help maintain balance and posture during the movement. The triceps brachii is responsible for the extension of the elbow, making it the main muscle worked during this exercise.

Benefits of Triceps Dips

Triceps dips are an effective exercise for targeting the triceps brachii in the back of the upper arm, as well as engaging the core to stabilize the body. The triceps play a key role in extending the elbows and are used in everyday activities like pushing a lawnmower or shopping cart. Maintaining strong triceps helps prevent muscle imbalances, especially in sports that emphasize pulling movements, reducing the risk of injury.

What are Variations of Triceps Dips?

Triceps Dip with Bent Knees: This variation of triceps dips is easier than the traditional version, as it involves bending the knees instead of keeping the legs straight. The added support from the legs reduces the strain on the shoulder joints.

Triceps Dips with Two Chairs: To increase the intensity of triceps dips, use two chairs or sturdy benches—one to support your upper body and the other for your lower body. This variation requires you to lift more of your body weight.

  • Place the chairs facing each other, about 3 feet apart.
  • Sit on the edge of one chair and grip the edge with your hands.
  • Place your heels on the edge of the other chair and hold yourself up using your triceps.
  • Slide forward just far enough that your behind clears the edge of the chair, then lower yourself until your elbows are bent between 45 and 90 degrees.
  • Push yourself back up to the start position and repeat. Go slowly and control the movement throughout the range of motion.
Resource:

Kovar, E. (2021, May 24). The chair dip: A triceps exercise. Verywell Fit. https://www.verywellfit.com/the-chair-dip-triceps-exercise-3120734

Categories
Exercise

Wall Sits

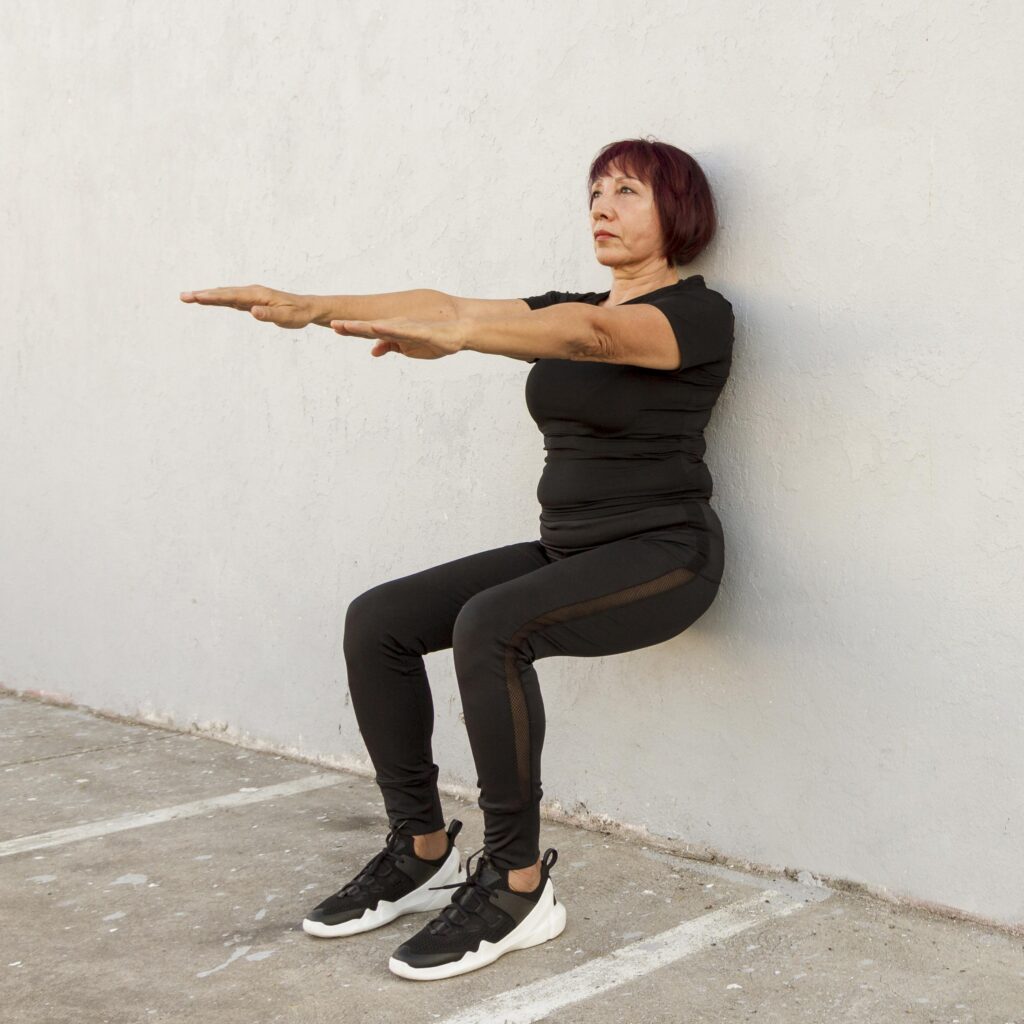
How to Do a Wall Sit Exercise
  • Start with your back against a wall with your feet shoulder-width apart and about 2 feet
    from the wall.
  • Engage your abdominal muscles and slowly slide your back down the wall until your
    thighs are parallel to the ground.
  • Adjust your feet so your knees are directly above your ankles (rather than over your toes).
  • Keep your back flat against the wall.
  • Hold the position for 20 to 60 seconds.
  • Slide slowly back up the wall to a standing position.
  • Rest for 30 seconds and repeat the wall sit three times. Increase your hold time in
    five-second increments as you increase your strength.
What Muscles Do Wall Sits Work?

Wall sits are an effective exercise for building isometric strength and endurance in the quadriceps, glutes, and calves.

Benefits of Wall Sits

Wall sits primarily target the quadriceps, helping to build muscular endurance and strength. They are often used to improve pre-season leg strength for sports like skiing, hockey, and running. Strengthening the quads helps balance muscle groups, especially for activities that engage the hamstrings. Wall sits can delay fatigue and improve performance, making them beneficial for athletes. They also support everyday activities such as standing up from a chair and walking downstairs, making them valuable for non-athletes as well. For sports conditioning, wall sits should be combined with other quad exercises.

What are Variations of Wall Sits?

Wall Sits with an Exercise Ball: Since wall sits can be intense, you may need to adjust your position or reduce the duration of the hold when you first attempt the exercise. Modifying your approach is perfectly fine and still helps build strength as you progress toward holding a full wall sit. For added comfort, you can place an exercise ball between your back and the wall.

Add Dumbbells to Wall Sits: For those who like to multitask, try holding a dumbbell in each hand while in the wall sit position. You can perform exercises like bicep curls, lateral raises, and shoulder presses. Holding weights during wall sits increases the intensity by adding more resistance.

Single-Leg Wall Sits: To increase the challenge, try single-leg wall sits. From the standard wall sit position, extend one leg in front for a few seconds, then return it to the floor and extend the other leg. Make sure your thighs stay parallel to the floor and your knees are aligned with your ankles.

Source:

Verywell Fit. (n.d.). The wall sit: A quad exercise. Verywell Fit. Retrieved January 28, 2025, from https://www.verywellfit.com/the-wall-sit-quad-exercise-3120741

Categories
Exercise

Skull Crushers

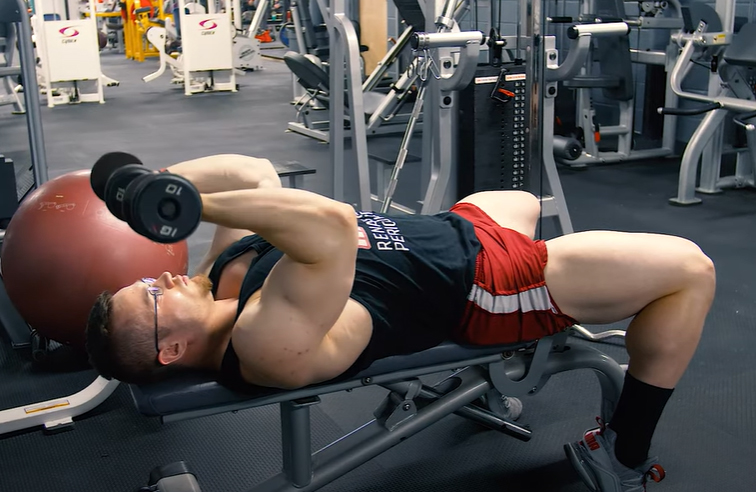
Dumbbell Skull Crushers
  • Flex your elbows and lower the weight toward the top of your head. Your upper arms should remain relatively perpendicular to your body. This keeps the tension on the triceps versus shifting it to the shoulders.
  • Continue lowering the weight behind the head. The bottom of the dumbbell head should be about in line with the bench’s top, or even a little higher if this feels unwieldy.
  • Reverse the movement until the weight is above the chest in the original starting position. Keep from locking the elbow to maintain tension in your triceps muscle.
  • Repeat.
What Muscles Do Skull Crushers Work?

The lying triceps extension is an isolation exercise designed to target the triceps, the muscles at the back of the upper arm. Often referred to as the “skull crusher,” it earned this name because improper form can pose a risk to your head. This exercise is commonly included in upper-body strength training routines.

Benefits of Skull Crushers

The skull crusher is a push exercise that isolates the triceps brachii, targeting its three heads from the elbow to the latissimus dorsi. It can be used to address triceps imbalances, aid in injury rehabilitation, or as part of a bodybuilding routine. Strengthening the triceps is beneficial for everyday activities like pushing or pulling. While there are other triceps extension variations, such as the overhead extension, the lying triceps extension is preferred by some because it avoids placing pressure on the wrists.

What Are Variations of Skull Crushers?

 Barbell Skull Crushers: Some people find lying triceps extensions easier with a barbell rather than a dumbbell. However, using a barbell, including an EZ curl bar, can put more strain on the wrists, so it’s important to be mindful of this. Strengthening your wrists beforehand may be beneficial if you choose to use a barbell.

Source:

Verywell Fit. (n.d.). Doing the triceps extension (skullcrusher). Verywell Fit. Retrieved January 28, 2025, from https://www.verywellfit.com/doing-the-triceps-extension-skullcrusher-3498313

Categories
Exercise

Goblet Squats

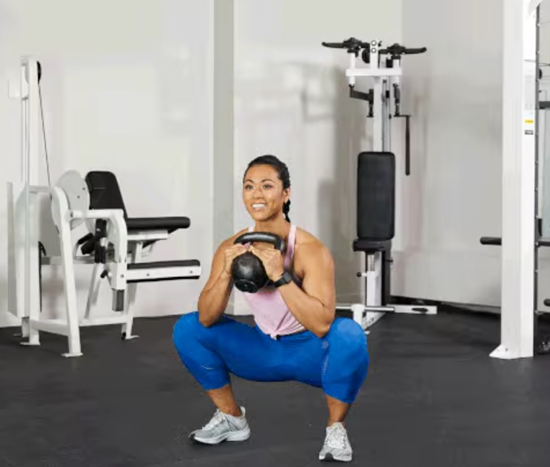
How to Perform a Dumbbell Goblet Squat
  • Stand with feet wider than hip-width apart, toes angled outward.
  • Hold the kettlebell at chest level, cupping the handles with elbows bent.
  • Warm up with a lighter kettlebell, then switch to a heavier weight for your set.
  • Engage your core, keep your back neutral, and look straight ahead.
  • Press your hips back and bend your knees to squat, inhaling as you lower.
  • Keep the kettlebell close to your body and chest tall.
  • Lower your hips below knee level, maintaining proper alignment.
  • Keep your weight on your heels, ensuring your elbows stay inside your knees.
  • Press through your heels to rise, exhaling and squeezing your glutes.
  • Complete the set, rack the kettlebell carefully, and repeat for more sets

 
What Muscles Do Goblet Squats Work?

The goblet squat primarily targets quadriceps, glutes, hamstrings, and calves. As you squat, the quadriceps in the front of your thighs extend your knees, while the glutes and hamstrings engage to help lower and rise from the squat. The core muscles, including the abdominals and lower back, stabilize the torso and maintain proper alignment throughout the movement. Additionally, the inner thigh muscles (adductors) help stabilize the legs, making the goblet squat an effective full-body exercise for strength and stability.

Benefits of Goblet Squats

The goblet squat is an effective exercise that promotes proper form while targeting major lower body muscles like the quadriceps, glutes, hamstrings, and calves. It also engages the core, back, forearms, shoulders, and upper back for added stability. As a beginner-friendly progression of the air squat, it helps individuals add resistance while improving squat form. By holding the kettlebell in front, the goblet squat emphasizes the quadriceps more than other squat variations, making it a great choice for building strength in this muscle group while working the entire body.


What Are Variations of Goblet Squats?

Single-Leg Goblet Squat: Hold the kettlebell in front of your body and squat on one leg, engaging your core and working on balance and stability.

Goblet Squat with Overhead Press: At the top of the squat, press the kettlebell overhead. This adds an upper-body component, targeting the shoulders and core while still focusing on the lower body.

Goblet Squat Jump: After reaching the bottom of the squat, jump up explosively, landing softly back into the squat position. This variation adds a plyometric element, boosting power and explosiveness.


Source:

Verywell Fit. (n.d.). How to goblet squat. Verywell Fit. Retrieved January 28, 2025, from https://www.verywellfit.com/how-to-goblet-squat-4589695

Categories
Exercise

Face Pulls

How To Do Cable Face Pulls
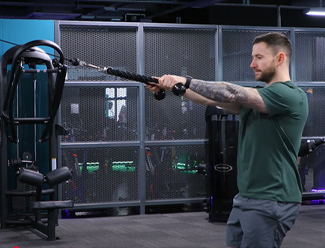
  • Reach up and grasp the handles with both hands with your palms facing in. Step back until your arms are fully extended, then engage your core and lean back slightly, positioning your body at a roughly 20-degree angle.
  • Pull the rope toward you just enough to start lifting the weight from the stack, then engage your shoulders, rolling them back to create good posture—you don’t want your shoulders hunching or rolling forward. This is your starting position.
  • Pull the handles of the attachment straight toward your forehead. Keep your palms facing in as your elbows flare outward toward the sides, engaging the rear delts.
  • Reverse the movement and slowly extend your arms without allowing your shoulders or chest to roll forward as you extend. You want to maintain good posture throughout the exercise.
What Muscles Do Face Pulls Work?

Face pulls primarily target the posterior deltoids of the shoulder, the muscles responsible for moving your arms backward, which are often overlooked in other shoulder exercises. This exercise involves using a cable pulley machine to pull the weight directly toward your forehead.

Benefits of Face Pulls

Face pulls are an effective exercise for strengthening the rear deltoids, trapezius, and upper back muscles, helping to balance the shoulders and prevent the “hunched forward” posture caused by overtraining the chest and front delts. According to Robert Herbst, a 19-time World Champion powerlifter, face pulls also support building a strong upper back, essential for stability in exercises like the bench press. Since the rear delts are often undertrained compared to the anterior and lateral heads of the deltoid, incorporating face pulls can improve posture, prevent shoulder pain, and enhance overall shoulder strength for daily activities like lifting, pulling, and rotating.

What are the Variations of Face Pulls?

Try Resistance Bands: If you have heavy-duty resistance bands, you can loop them over a high attachment point, like a pull-up bar, to mimic the face pull movement. This is a great option for beginners training their rear delts, though the resistance may be insufficient for advanced exercisers. However, exercise safety experts warn against using bands near your face, as they can pose a risk of injury if they slip or break.

Use Dumbbells: If you do not have access to a cable machine or resistance bands, you can use dumbbells to perform rear delt-focused exercises, like the rear delt dumbbell fly. While it is not a perfect substitute for face pulls, it effectively targets the same muscle groups.

Try Seated Face Pulls: For building muscle and lifting heavier weights, perform face pulls in a seated position. Sitting helps stabilize your torso, preventing the use of your hips and lower body, which can reduce the load on your deltoids.

Source:

Preece, J. (n.d.). Face pulls: An exercise for stronger shoulders. Verywell Fit. Retrieved January 28, 2025, from https://www.verywellfit.com/face-pulls-exercise-for-stronger-shoulders-4161298

Categories
Exercise

Lunges

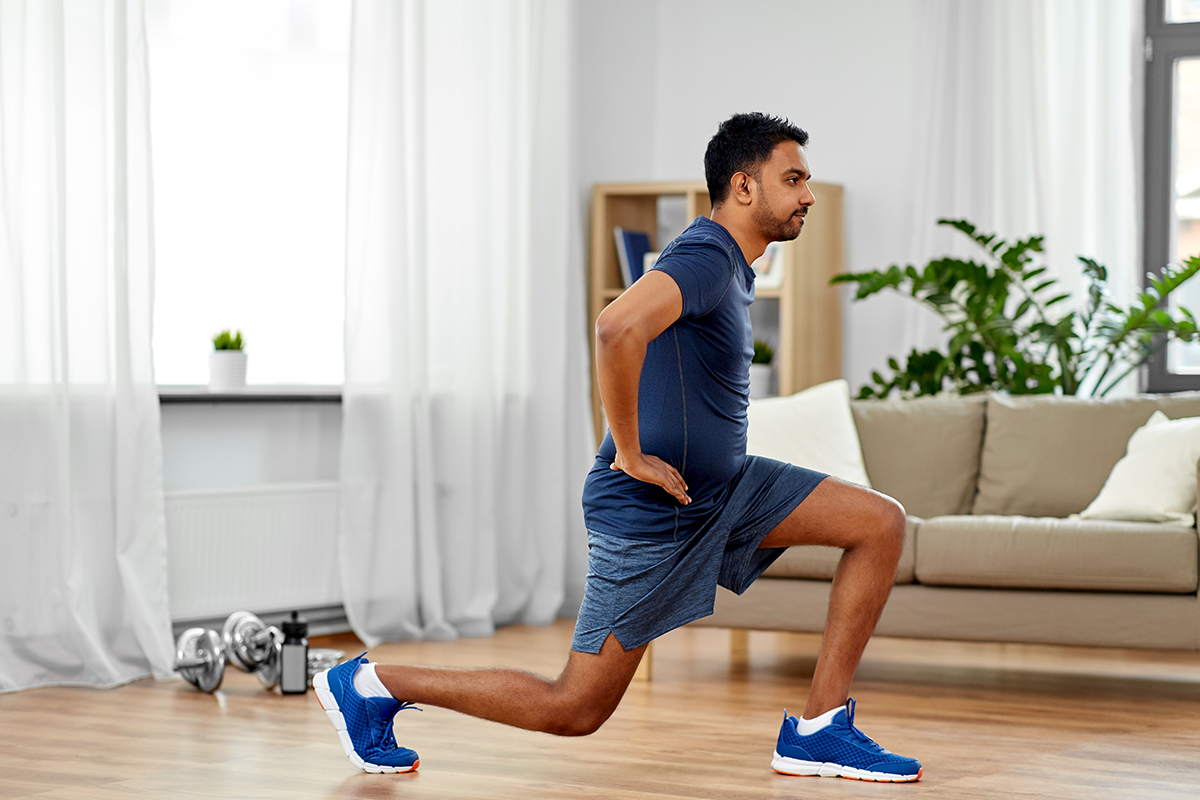
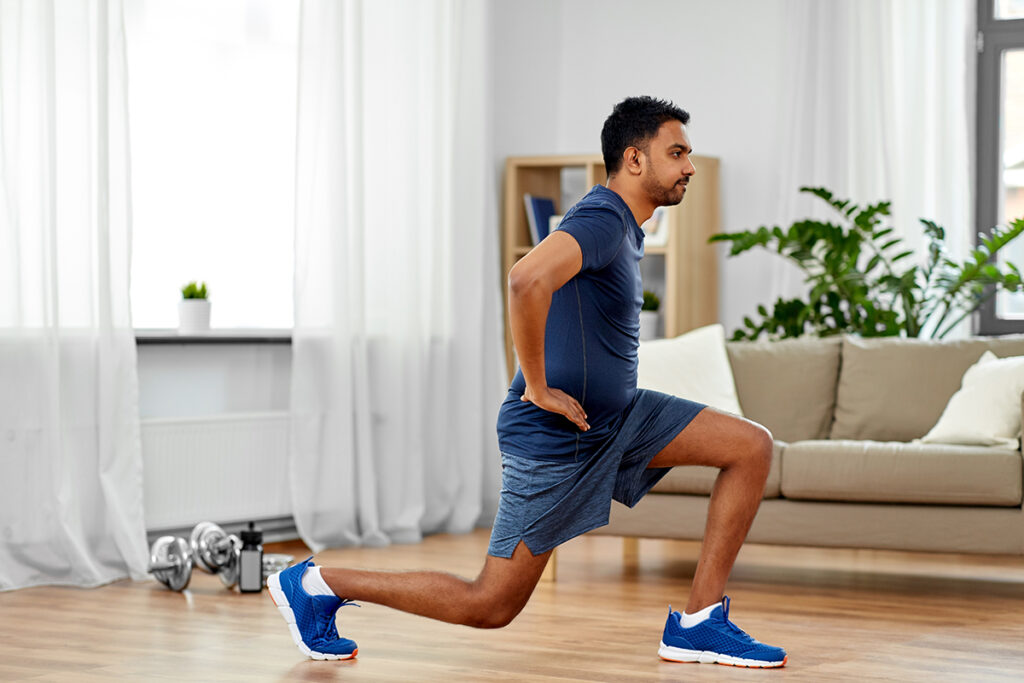
Lunges for Beginners
  • Bend the knees and lower your body until the back knee is a few inches from the floor. At the bottom of the movement, the front thigh is parallel to the ground, the back knee points toward the floor, and your weight is evenly distributed between both legs.
  • Push back up to the starting position, keeping your weight on the heel of the front foot.
What Muscles Do Lunges Work?


Lunges are an effective exercise that targets and strengthens nearly every muscle in the lower body. Mastering proper form makes lunges a valuable addition to any strength training or circuit workout routine.


Benefits of Lunges


Lunges are a multi-joint exercise that target and strengthen the quads, hamstrings, glutes, and calves while also stretching the hip flexors. They engage the core for stability, improving balance and reducing injury risk. As a functional exercise, lunges mimic daily movements, like picking things up from the floor, and may boost metabolism. The split stance of lunges also allows for more independent leg work compared to exercises like squats.

What are the Lunge Variations?


Half Lunge: This variation uses a smaller range of motion, lowering only halfway compared to a standard lunge, stopping before your front knee reaches a 90-degree angle. It helps maintain good form while reducing stress on the knee joints.


Front Foot Elevated Lunge: If regular lunges cause knee discomfort, try placing your front foot on a step or small platform. Ensure your entire foot is on the surface and lower your body until your front thigh is parallel to the floor.


Dumbbell Lunge: To increase the intensity of your lunge, hold a dumbbell in each hand. Perform the movement as usual, but with your arms hanging at your sides, rather than resting on your hips.

Resource:


Verywell Fit. (n.d.). How to lunge: Variations, modifications, and mistakes to avoid. Verywell Fit. https://www.verywellfit.com/how-to-lunge-variations-modifications-and-mistakes-123132

Categories
Exercise

Glute Bridge

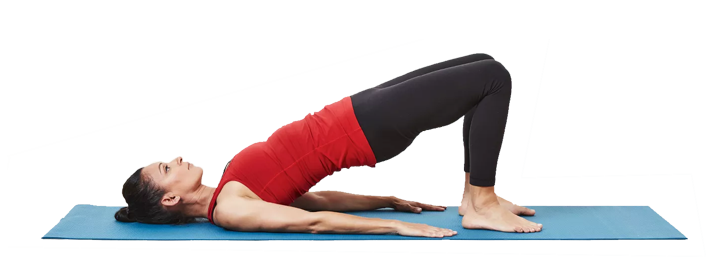
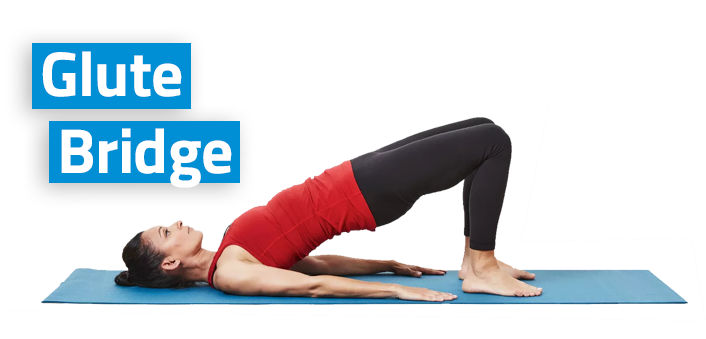
How to Perform the Perfect Glute Bridge
  • Tighten your abdominal and buttock muscles by pushing your low back into the ground.
  • Raise your hips to create a straight line from your knees to your shoulders.
  • Squeeze your core and pull your belly button back toward your spine.
  • Hold for 20 to 30 seconds.
  • Lower your hips to return to the starting position.

What Muscles Do the Glute Bridge Exercise Work?

The bridge exercise targets the glutes (buttocks) and hamstrings (back of the thighs) while improving core stability. It is a simple addition to a warm-up or strength-training routine and is also beneficial for rehabilitation, helping to enhance core and spinal stabilization.

Benefits of the Glute Bridge

The basic bridge is an excellent addition to your strength routine, targeting the core and glutes while also strengthening the erector spinae, which runs along your back. This exercise stretches the posterior chain, including the hip abductors, glutes, and hamstrings, while engaging the rectus abdominis, obliques, and quadriceps for stability. Using sandbags can enhance the therapeutic effects by targeting underutilized muscles. As these muscle groups strengthen, power and posture improve, and lower back pain may be relieved, making the bridge a safe option for individuals with chronic back issues.

What Are the Glute Bridge Variations?

Elevated Feet: For added support, try the elevated bridge using an inflatable exercise ball. Start in the basic bridge position, placing your heels on top of the ball. Lift your pelvis as you would in the basic bridge, ensuring your core remains engaged throughout the movement.

Single-Leg Glute Bridge: To level up from the basic bridge, try the single-leg bridge, with or without an exercise ball. This variation engages your trunk muscles more effectively. Start in the basic glute bridge position, then raise your left leg as you lift your pelvis. Hold, lower your hips back down, keeping your leg elevated, and then switch to the right side.

Source:

Cramer, M. (2023, August 23). How to do the bridge exercise. Verywell Fit. https://www.verywellfit.com/how-to-do-the-bridge-exercise-3120738

Categories
Exercise

Bicep Curls

Bicep Curls (Dumbbell Form & Technique)
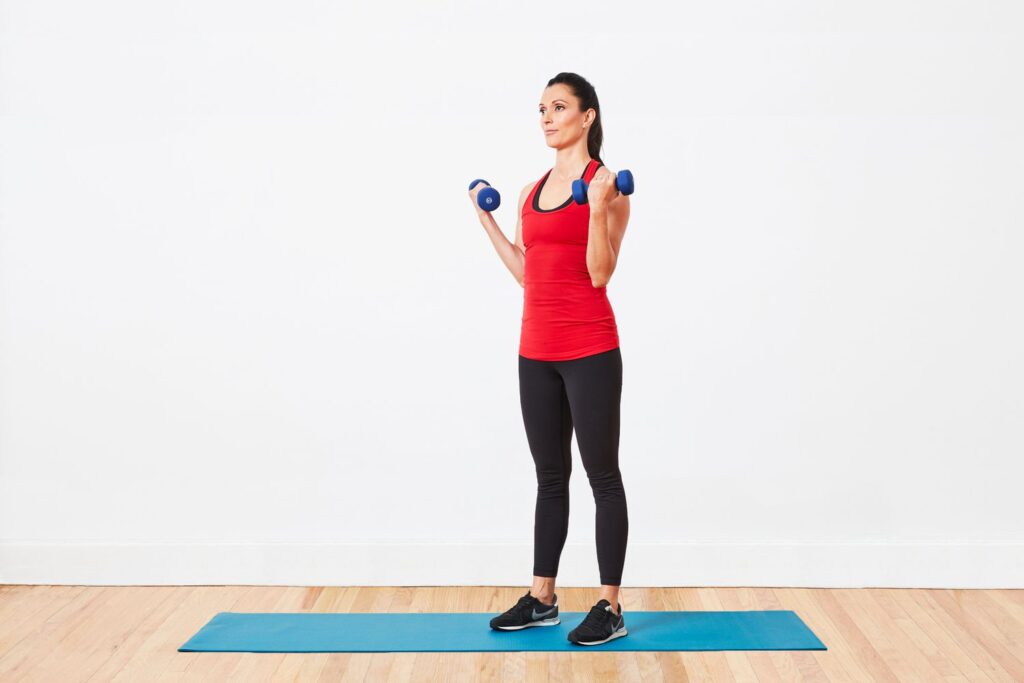
  • Begin standing tall with your feet about hip-width apart. Keep your abdominal muscles engaged.
  • Hold one dumbbell in each hand. Let your arms relax down at the sides of your body with palms facing forward.
  • Keep your upper arms stable and shoulders relaxed, bend at the elbow and lift the weights so that the dumbbells approach your shoulders. Or for a full range of motion, raise the dumbbells to your eyes or forehead level. Your elbows should stay tucked in close to your body.
  • Exhale while lifting.
  • Lower the weights to the starting position.
  • Perform the desired reps, staying within 3 to 5 reps of total failure.
What Muscles Do Biceps Curls Work?

The bicep curl is a popular weight-training exercise that primarily targets the upper arm muscles, with secondary engagement of the lower arm. It is highly effective for improving strength and muscle definition.

Benefits of Biceps Curls

Regularly performing bicep curls help build upper arm strength and teaches proper muscle engagement by bracing with the core. Curls target the biceps at the front of the upper arm, as well as the brachialis and brachioradialis muscles in the lower arm. These muscles are used whenever you lift or carry objects, making bicep curls beneficial for daily activities.

What are the Biceps Curls Variations?

Barbell Curl: One popular bicep curl variation is the barbell curl, which can be done with a standard barbell, a pre-loaded smaller barbell, or an EZ curl bar. Start by holding the barbell with an underhand grip, letting it hang by your legs. Slowly raise the barbell by bending your elbows, keeping your arms close to your body, until it reaches shoulder, eye, or forehead height. A larger range of motion can enhance muscle growth. Lower the barbell slowly, maintaining control until your arms are fully extended.

Source:

Verywell Fit. (n.d.). How to do the biceps arm curl. Verywell Fit. https://www.verywellfit.com/how-to-do-the-biceps-arm-curl-3498604

Categories
Exercise

Bulgarian Split Squat

How to do a Bulgarian Split Squat / Proper Setup
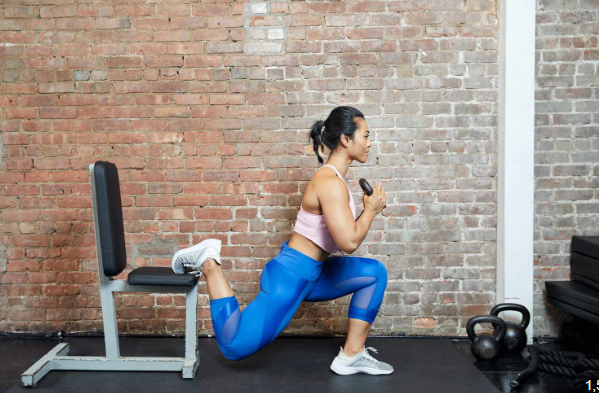
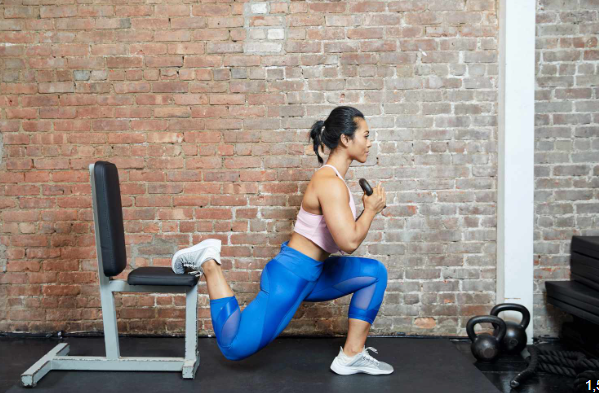
  • Stand about two feet in front of a sturdy bench or chair, feet hip-width apart, core engaged, shoulders back, and chest up.
  • Place your right foot on the bench behind you, either with the top of your foot flat or balancing on the ball of your foot.
  • Keep your feet hip-width apart (or slightly wider) to maintain balance.
  • Focus the movement on your front leg; the back foot is for balance only.
  • Bend your left knee, lowering your body while keeping your chest high and core engaged. Ensure your left knee aligns with your toes and doesn’t cave inward.
  • Lower until your left thigh is parallel to the ground, inhaling as you descend.
  • Push through your left foot to return to standing, using your left quad and glute, exhaling as you rise.
  • Complete all repetitions on one side, then switch to the other side to keep things balanced.
What Muscles Do Bulgarian Split Squat Work?

Bulgarian split squats are a compound lower-body exercise that primarily target the quadriceps while also engaging the hamstrings, glutes, and calves. The front leg does most of the work, with the back leg providing balance support. This exercise also challenges your balance, keeping your core muscles, including the abdominals and spinal erectors, engaged throughout the movement.

Benefits of Bulgarian Split Squat

The Bulgarian split squat improves lower-body strength, targeting quads, glutes, hamstrings, and calves, while engaging the core for balance and stability. It helps correct muscle imbalances, enhances agility, and reduces injury risk. Additionally, it supports better posture, alignment, and overall functional movement, contributing to long-term physical health and injury prevention.

What are the Bulgarian Split Squat Variations?

Split Squat: The Bulgarian split squat differs from the split squat in that the back leg is elevated on a bench or chair in the Bulgarian version, focusing more on the front leg. In the split squat, both feet remain flat on the ground, with the back leg primarily providing balance. Both exercises target the front leg, engaging the quads, glutes, hamstrings, and core for stability, but the Bulgarian split squat increases intensity due to the elevated back leg.

Bulgarian Split Squat with Resistance Bands: A challenging variation of the Bulgarian split squat involves using a resistance band. To add resistance as you rise from the squat, place the band under your front foot. Hold the band with your arms bent, bringing it in line with your shoulders while performing the exercise.

Bulgarian Split Squat with an Exercise Ball: To challenge your core further, try using an exercise ball. Elevate your back leg onto the ball instead of a bench or chair. Move slowly to maintain proper form, as your core will work harder to keep you balanced throughout the exercise.

Source:

Verywell Fit. (n.d.). How to do a Bulgarian split squat. Verywell Fit. https://www.verywellfit.com/how-to-do-a-bulgarian-split-squat-4589307